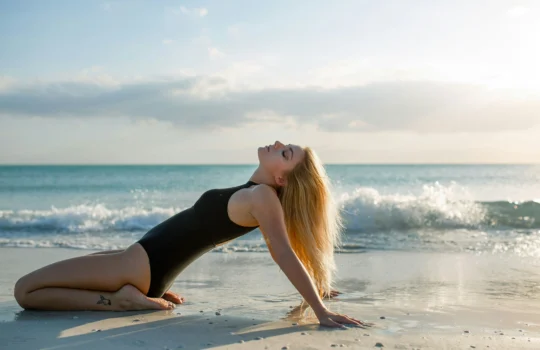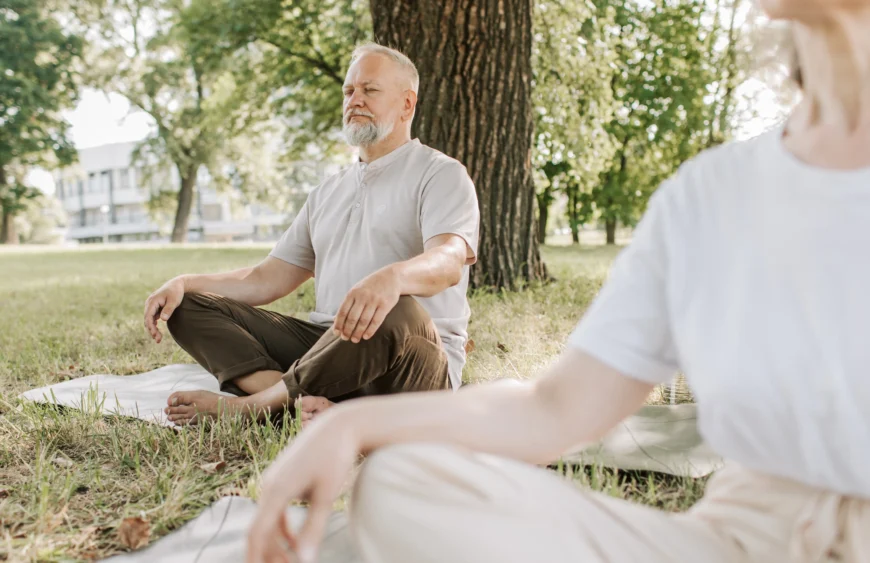
Forget about those old tales of inevitable decline—yoga is here to kick those myths to the curb. Easy yoga poses for yoga for old people, whether you’re 55 or 75, it’s never too late to start bending, stretching, and twisting your way to a healthier, more vibrant you.
Yoga isn’t just about touching your toes or standing on one leg while you make a grocery list in your head; it’s about creating a balance that rejuvenates your body, calms your mind, and yes, can even help slow down the aging clock. From boosting flexibility to enhancing mental health, yoga offers a fountain of youth that’s just a pose away.
So, roll out that mat, grab a water bottle, and get ready to explore 10 amazing yoga routines that will keep you feeling young, spry, and ready to take on the world—or at least your morning walk! 🌟💪
Let’s get into it, shall we?
Table of Contents
1. Cat-Cow Stretch
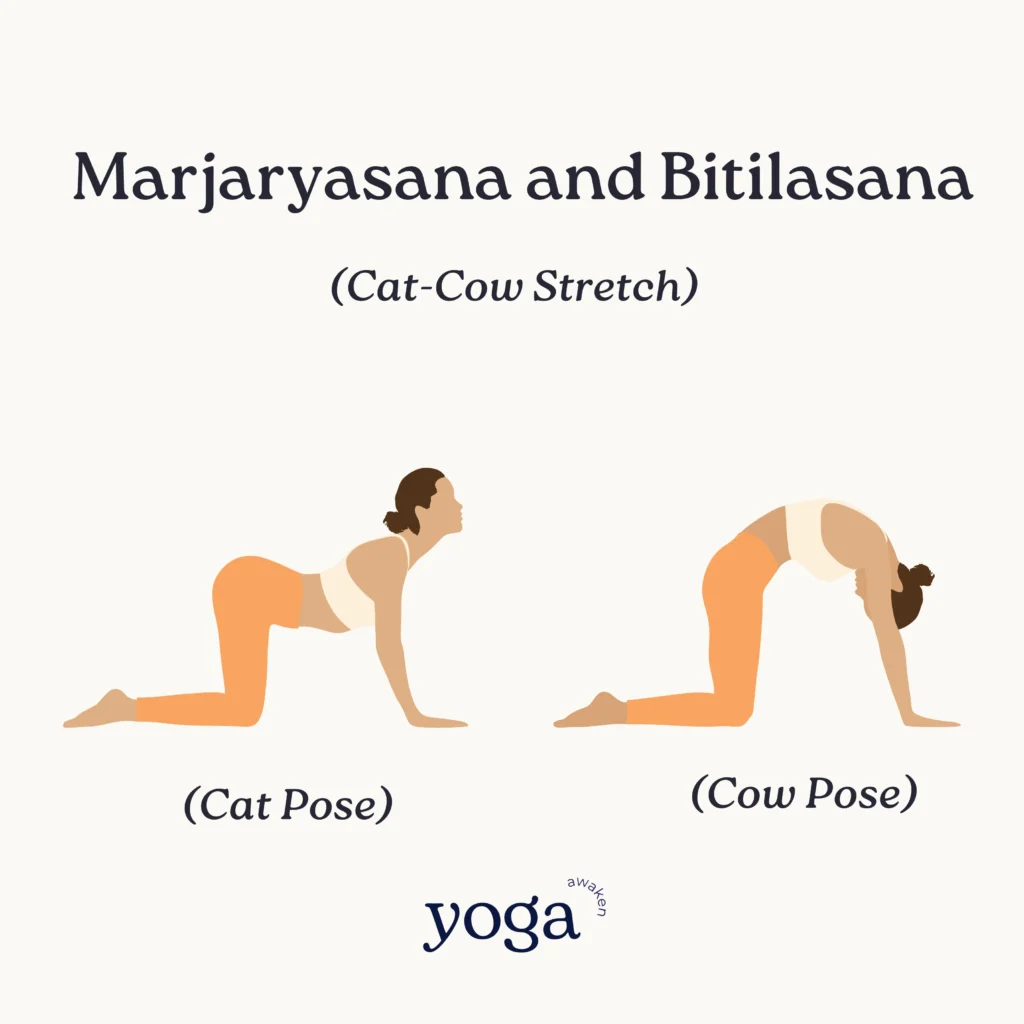
Start with Simplicity: The Cat-Cow Stretch
Ready to ease into your yoga journey with something gentle yet incredibly effective? Let’s talk about the Cat-Cow Stretch, a smooth, flowing pose that anyone can master.
How to Do It:
- Start on All Fours: Position yourself on your hands and knees on a comfortable yoga mat. Make sure your knees are set directly below your hips and your wrists, elbows, and shoulders are in line and perpendicular to the floor.
- Inhale, Cow Pose: As you breathe in, slowly drop your belly towards the mat, lift your chin and chest, and gaze upward. This is the Cow position, which stretches your neck and the soft belly region.
- Exhale, Cat Pose: On the exhale, draw your belly to your spine and round your back toward the ceiling like a cat. The position should look like a cat stretching its back. Bring the crown of your head toward the floor, but don’t force your chin to your chest.
- Flow Between Poses: Alternate between Cow on the inhale and Cat on the exhale, creating a fluid movement. Repeat this cycle 5-10 times, focusing on slow, deep breaths.
Benefits:
- Spinal Flexibility: This stretching helps increase the flexibility of your spine, crucial for maintaining posture and balance.
- Stress Relief: The movement also massages your spine and relieves tension in your torso, contributing to overall stress reduction.
- Digestive Boost: Gentle compression and release in the abdominal area stimulate your digestive organs, promoting better digestion.
Pro Tips:
- Mind Your Shoulders and Knees: If you have sensitive knees, consider placing a folded blanket under them for extra padding. Likewise, if your wrists get sore easily, you can make fists or use yoga blocks to support your hands.
- Engage Your Core: To protect your lower back, keep your core slightly engaged throughout the exercise. This engagement also enhances the strength-building aspect of the stretch.
The Cat-Cow Stretch isn’t just a warm-up; it’s a fantastic way to keep your body aligned and your mind clear. Who knew such simple moves could make such a big impact? Give it a try and feel the difference!
2. Tree Pose
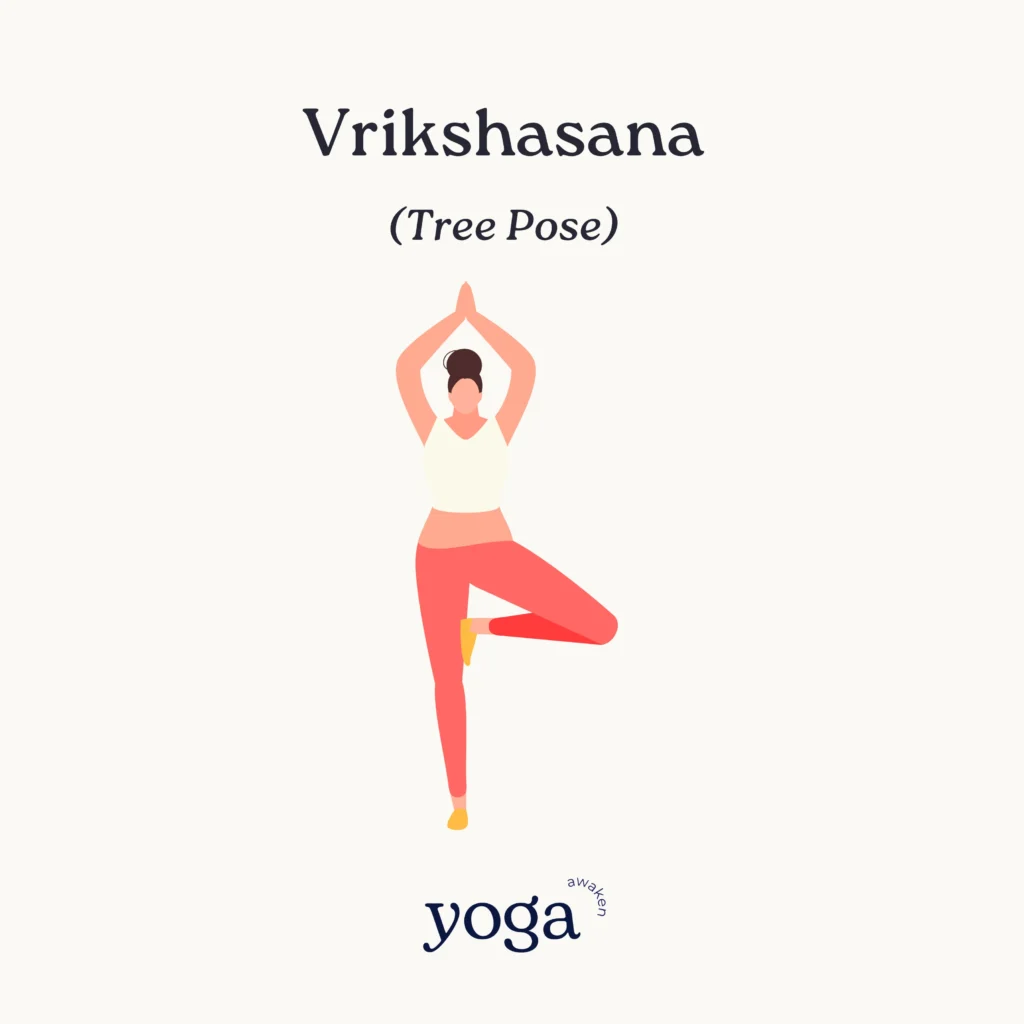
Balance and Stability with the Tree Pose
After loosening up with the Cat-Cow Stretch, let’s root down and rise up with the Tree Pose! This iconic pose is more than just a pretty Instagram photo—it’s a fantastic way to boost your balance and stabilize your core, all while feeling grounded.
How to Do It:
- Find Your Base: Begin by standing straight with your feet hip-width apart. Shift your weight slightly onto your left foot, keeping the inner foot firm to the floor.
- Position Your Foot: Bend your right knee, then reach down and grab your right ankle. Place the sole of your right foot on your inner left thigh, avoiding the knee area. If this feels too challenging, you can place your foot on your lower leg (just not on the knee).
- Align Your Body: Adjust your body so that your pelvis is neutral, with your tailbone pointing toward the floor. The center of your pelvis should be directly over your left foot.
- Raise Your Arms: Once you are balanced, bring your hands into a prayer position in front of your chest. For an added challenge and a bit more flair, extend your arms over your shoulders, palms facing each other or touching to form a peak.
- Focus and Breathe: Find a spot in front of you that doesn’t move and focus your gaze (drishti) on it to help maintain balance. Stand tall and steady, breathing evenly, and hold the pose for 30 seconds to 1 minute.
- Repeat on the Opposite Side: Lower your arms and leg gently, stand tall for a few breaths, then switch sides and repeat the pose.
Benefits:
- Enhanced Balance and Stability: Tree Pose strengthens your thighs, calves, ankles, and spine while building your balance and poise, which can be especially beneficial as you age.
- Improved Focus and Calm: Balancing poses require concentration, which can help quiet the mind and reduce stress levels.
- Increased Flexibility in Hips and Legs: The position of your raised leg opens your hips and stretches your thighs and groin area.
Pro Tips:
- Use a Wall: If you find balancing particularly challenging, stand near a wall to use as support until you feel more confident.
- Don’t Rush: Take your time getting into the pose. If your foot slips down, just calmly reposition it. It’s more about the journey than perfection!
- Engage Your Core: Activating your core muscles not only helps maintain your balance but also protects your spine during the pose.
The Tree Pose is a beautiful blend of stability, strength, and serenity—perfect for fostering both physical and mental resilience. Ready to try standing strong and serene? Let’s plant those feet and grow tall!
3. Warrior II
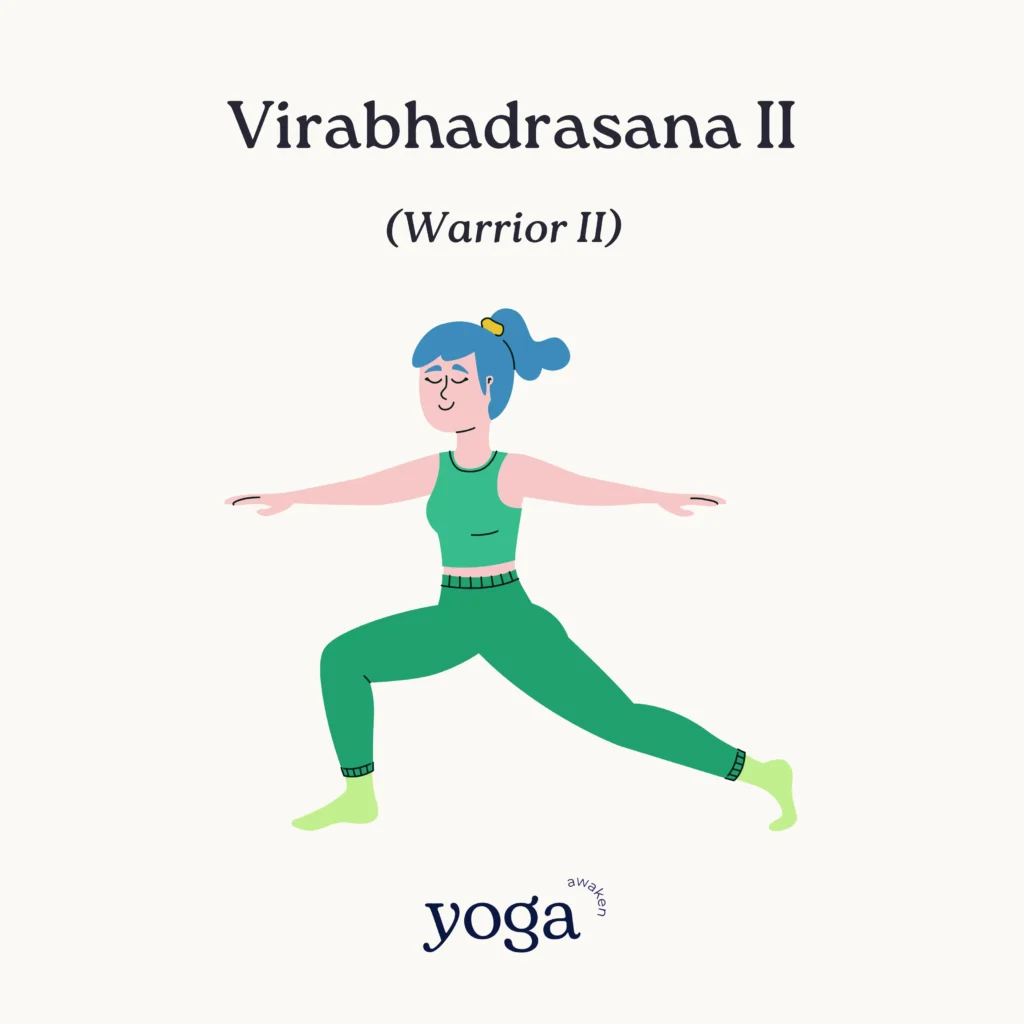
Embrace Strength with Warrior II
Now, let’s channel our inner strength with the powerful Warrior II Pose. This dynamic stance is not only a testament to your physical resilience but also a great way to feel empowered and rooted.
How to Do It:
- Position Your Feet: Start standing with your legs about 3 to 4 feet apart. Turn your right foot out 90 degrees and your left foot in slightly.
- Align Your Heels: Ensure that your right heel is aligned with the center of your left foot.
- Extend Your Arms: Raise your arms to the side to shoulder height, parallel to the floor, palms facing down, stretching actively through your fingertips.
- Bend Your Right Knee: Exhale as you bend your right knee over your right ankle, so that your shin is perpendicular to the floor. If possible, bring the right thigh parallel to the floor.
- Gaze and Form: Turn your head to gaze over your right hand. Keep your torso perpendicular to the floor, with the left side of your torso slightly forward. Draw your tailbone slightly toward the pubis.
- Hold and Breathe: Stay in this position for 30 seconds to 1 minute. Take slow, deep breaths to maintain focus and stability.
- Switch Sides: To release, inhale as you straighten your right knee. Lower your arms and turn your feet forward. Shake your legs out before switching sides and repeating the pose.
Benefits:
- Strengthens Your Legs and Ankles: By holding your body in a lunge position, you build power in your legs and stability in your ankles.
- Opens Your Hips and Chest: The pose stretches your hips, chest, and shoulders, improving flexibility and increasing circulation.
- Boosts Stamina and Concentration: Holding the pose builds endurance in your legs and core while sharpening your focus and concentration.
Pro Tips:
- Watch Your Knee: Ensure your front knee doesn’t extend past your toes to avoid strain. Instead, keep it directly above your ankle.
- Engage Your Core: Activating your core will not only improve your balance but also support your lower back during the pose.
- Modify if Needed: If standing wide is uncomfortable, shorten your stance. You can also rest your back hand on your lower back if extending it causes discomfort.
Warrior II is a pose that embodies strength and control, teaching you to balance effort with ease. As you practice this pose, reflect on the power and courage within you, proving that strength knows no age. Ready to stand strong in your Warrior II? Let’s make it happen!
4. Seated Twist
Gentle Yet Powerful: The Seated Twist
After embracing the strength and power of Warrior II, let’s switch gears and unwind with a Seated Twist. This soothing pose is perfect for realigning and rejuvenating your spine while also refreshing your mind.
How to Do It:
- Find Your Seat: Sit on the floor with your legs straight out in front of you. If sitting on the floor is uncomfortable, you can sit on a cushion to raise your hips for better alignment.
- Bend and Position Your Legs: Bend your knees and place your feet flat on the floor. Slide your left foot under your right leg to the outside of your right hip. Lay the outside of the left leg on the floor. Then step the right foot over the left leg and stand it on the floor outside your left hip. The right knee will point directly up at the ceiling.
- Initiate the Twist: Exhale as you twist toward the inside of your right thigh. Press your right hand behind you and set your left upper arm on the outside of your right thigh near the knee. Use your arm to nudge the knee as you twist.
- Deepen the Stretch: Every time you inhale, lift a little more through the sternum, pushing the floor with your fingers. With each exhale, increase the twist. Gaze over your right shoulder.
- Hold, Release, and Repeat: Stay in this pose for about 30 to 60 seconds, breathing deeply. Release the twist with an exhale and return to the starting position. Repeat the sequence on the opposite side for balance.
Benefits:
- Spinal Flexibility and Health: This twisting motion helps to increase spinal flexibility and encourages fresh blood flow to your spinal discs.
- Digestive Function: Twisting poses massage your abdominal organs, helping to stimulate digestion and detoxification.
- Stress Relief: The act of twisting and releasing can help relieve feelings of stress and tension in your body, particularly around your back and shoulders.
Pro Tips:
- Keep Your Spine Erect: Ensure that you maintain an upright posture to avoid any undue strain on your back.
- Adjust Your Legs: If crossing your legs as described feels too intense, keep both legs straight or gently bend the bottom leg without crossing it under.
- Listen to Your Body: Never force a twist—move only as far as your body comfortably allows. The benefit of the twist comes from the lengthening of the spine rather than the depth of the twist.
The Seated Twist is a beautifully grounding pose that combines the benefits of stretching, breathing, and gentle twisting to create a holistic impact on your physical and mental well-being. Ready to twist away the tension? Let’s turn toward tranquility!
5. Bridge Pose
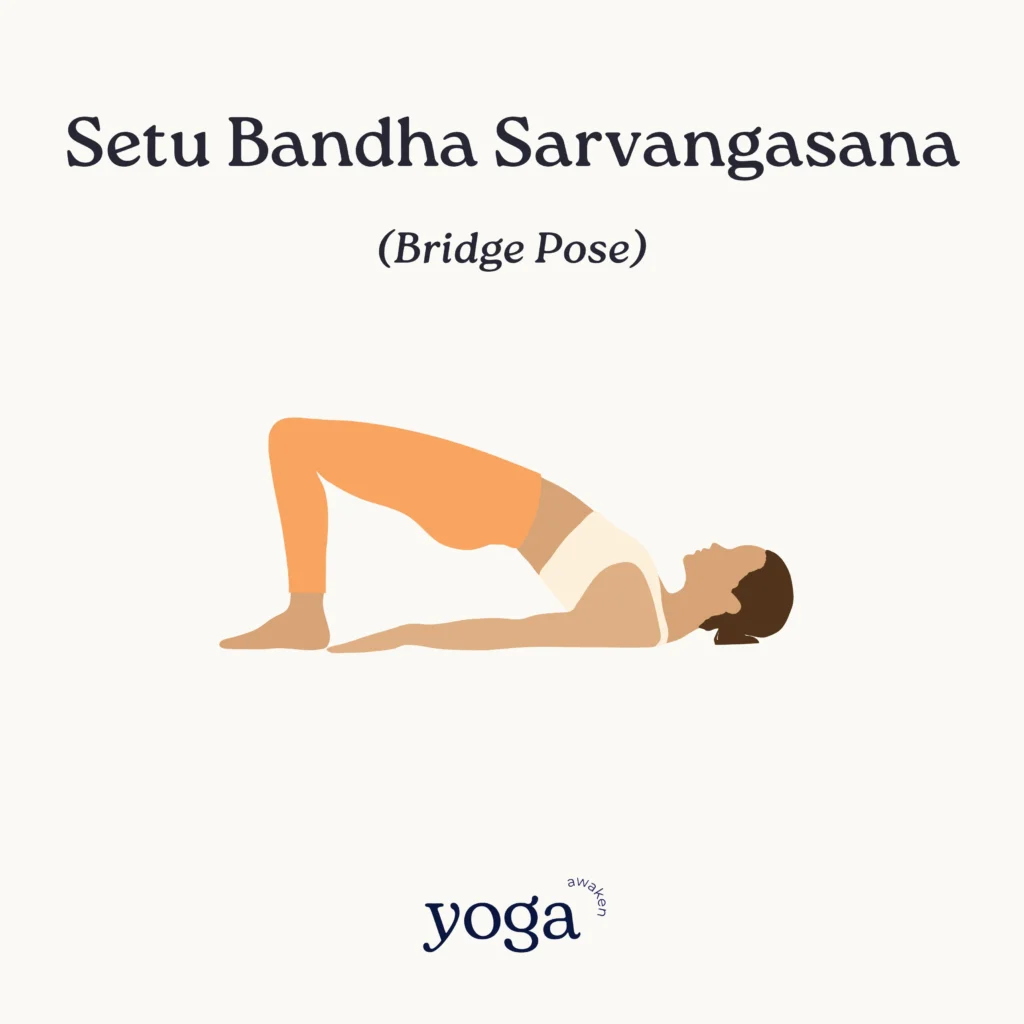
Build Core Strength with the Bridge Pose
Elevate your yoga session with the Bridge Pose, a rejuvenating backbend that strengthens your core and stabilizes your spine. It’s perfect for reversing the daily stress and strain placed on your back, providing a sweet lift that leaves you feeling refreshed and empowered.
How to Do It:
- Start on Your Back: Lie flat on your back with your knees bent and feet flat on the floor, hip-width apart. Place your arms at your sides with palms facing down.
- Lift Your Hips: Press your feet and arms firmly into the floor and lift your hips toward the ceiling. Keep your thighs and feet parallel as you lift. Squeeze your glutes and hamstrings as you rise.
- Enhance the Pose: Clasp your hands under your pelvis and extend through your arms to help you stay on the tops of your shoulders. This will increase the lift of your hips, intensifying the stretch in your chest and spine.
- Hold and Breathe: Hold the pose for up to a minute, breathing deeply and steadily. Feel the stretch across your chest, neck, and spine.
- Release: To come out of the pose, unclasp your hands and carefully roll your spine back down to the floor, vertebra by vertebra. Rest for a few breaths and then repeat if desired.
Benefits:
- Strengthens Major Core Muscles: Activates and strengthens the glutes, hamstrings, and lower back, critical for overall stability and strength.
- Improves Spinal Flexibility: Encourages a gentle stretch in the spine and helps alleviate tension in the back.
- Chest and Hip Opener: Expands the chest and hips, which can often become tight from daily activities like sitting and walking.
Pro Tips:
- Keep Your Feet Flat: Ensure your feet stay firmly planted on the floor and do not splay outwards to maintain proper alignment and prevent knee strain.
- Don’t Overarch Your Neck: Keep your neck relaxed and in a neutral position to avoid compression.
- Use a Block for Support: If maintaining the lift in the pose is challenging, place a yoga block under your sacrum for support. This modification allows you to experience the benefits of the pose without strain.
Bridge Pose is a wonderfully versatile backbend that offers an array of physical benefits while also being accessible for yoga practitioners of all levels. Whether you’re looking to strengthen your back, open your chest, or simply enjoy a moment of uplifting tranquility, the Bridge Pose is a go-to move that brings great benefits. Ready to bridge the gap to a stronger you? Let’s get lifting!
6. Chair Yoga Pose
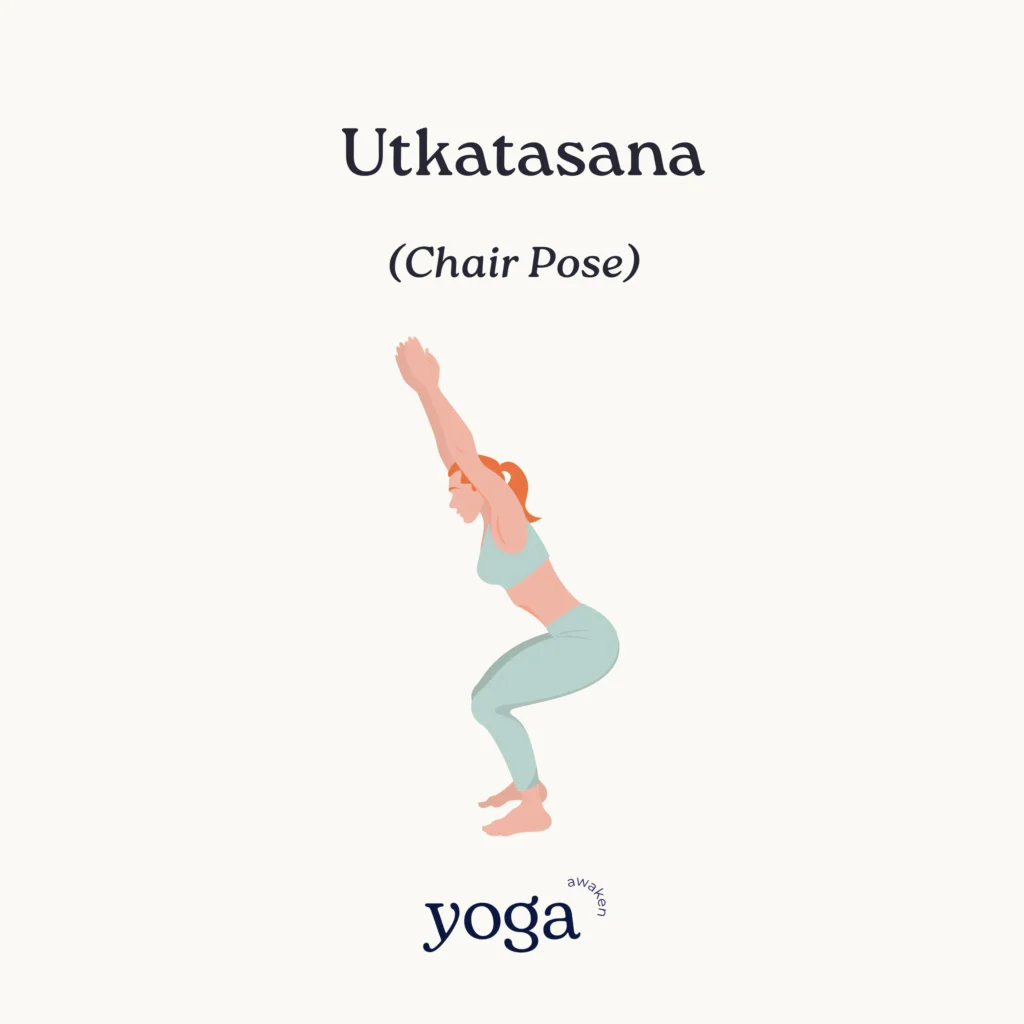
Accessible Yoga: The Chair Pose
Chair Yoga isn’t just about taking it easy—it’s about making yoga accessible and effective for everyone, regardless of mobility or balance issues. Let’s explore how the Chair Pose (also known as Utkatasana, but here adapted for those who need or prefer to use a chair) can be a powerhouse move for enhancing stability and strength.
How to Do It:
- Prepare Your Chair: Use a sturdy chair without wheels, preferably one without arms. Place it on a non-slip surface to ensure safety throughout the pose.
- Sit and Position: Sit on the chair with your feet flat on the floor, hip-width apart. Lean slightly forward, keeping your back straight but not stiff.
- Engage and Lift: Press down into your feet and begin to lift your buttocks off the chair. Use your thighs to lift, engaging your core and leg muscles. If you feel stable, try to hover just above the seat, building strength in your legs.
- Arm Variation: To add an upper body component, raise your arms in front of you as you lift, keeping them parallel to the floor, or extend them upwards if your balance permits.
- Hold and Breathe: Hold the position for a few breaths—anywhere from three to five deep breaths. Focus on maintaining a strong, engaged posture.
- Sit Back Down Gently: Lower yourself back to the chair slowly and with control. Rest for a moment before attempting additional repetitions if desired.
Benefits:
- Strengthens Lower Body: Builds strength in the thighs, calves, and ankles without the need for standing poses that might challenge balance.
- Enhances Core Stability: Engages the abdominal muscles, which helps to stabilize the body and support the spine.
- Improves Functional Mobility: Practicing this move can make everyday activities like standing from a seated position easier and safer.
Pro Tips:
- Focus on Alignment: Keep your knees in line with your feet and avoid letting them splay inward or outward to protect your joints.
- Adjust Intensity: Control the intensity by adjusting how high you lift off the chair. Even a small lift engages the muscles.
- Use Your Breath: Coordinate your movement with your breathing to help maintain focus and deepen the engagement of your core.
The Chair Pose is an excellent example of how adaptable yoga can be, providing significant benefits from a seated position. This pose allows individuals to experience the strength-building aspects of yoga in a way that is accessible and supportive. Ready to feel empowered right from your seat? Give this modified Chair Pose a try!
7. Legs Up the Wall
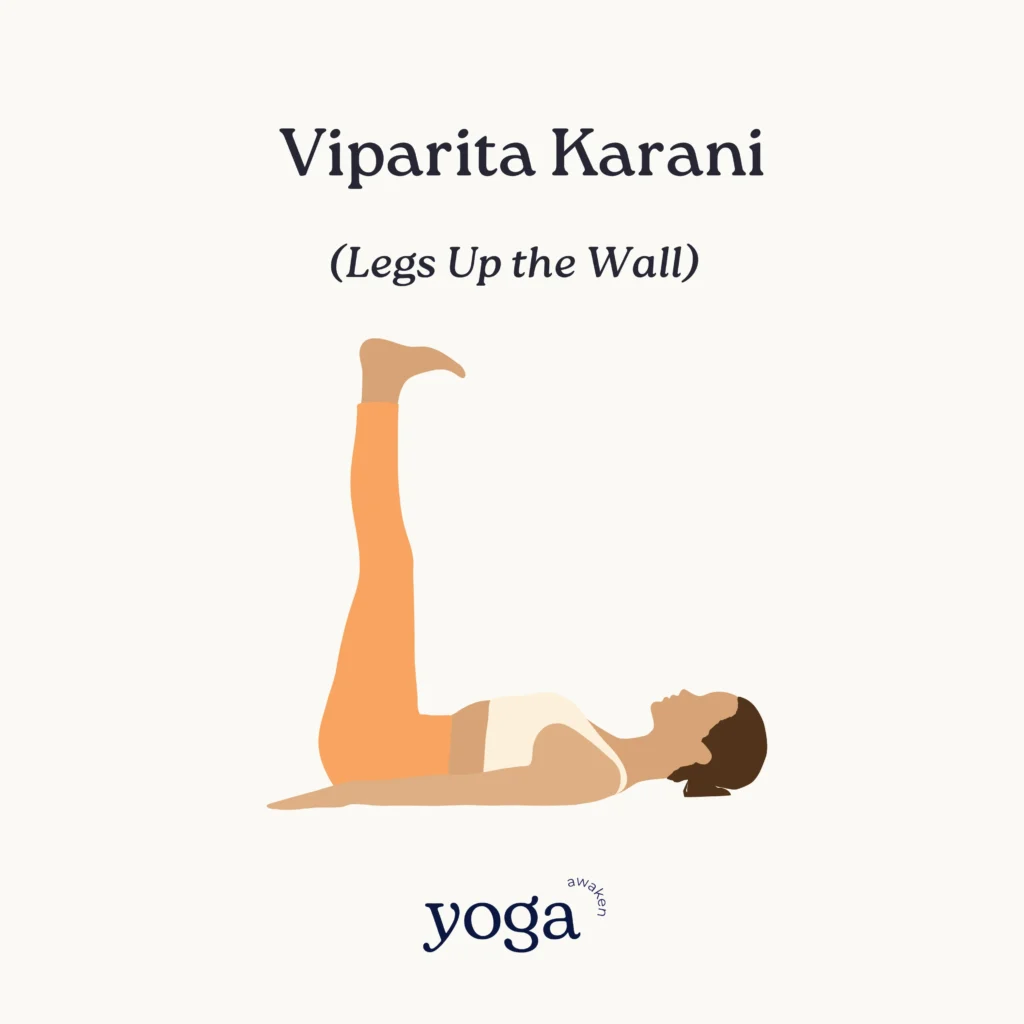
Relax and Restore with Legs Up the Wall
After engaging your muscles with the Chair Pose, it’s time to unwind and rejuvenate with the Legs Up the Wall pose. This restorative posture is perfect for easing the legs, mind, and nervous system, especially after a day of activity.
How to Do It:
- Find Your Space: Choose a space next to a clear, unobstructed wall. Place a yoga mat or a folded blanket perpendicular to the wall for cushioning your hips.
- Get Into Position: Sit with one side of your body against the wall, then gently turn your body to bring your legs up onto the wall as you lay back on the floor. Your hips can be a few inches away from the wall or slightly touching, based on what feels comfortable for your body.
- Adjust and Settle: Allow your body to sink into the floor, with your arms at your sides, palms facing up. Adjust your buttocks and the distance from the wall to find the most relaxing position for your legs.
- Focus on Relaxation: Close your eyes and focus on deep, slow breaths. Let the gravity do the work, allowing your legs to relax completely. Stay in this position for 5 to 15 minutes, enjoying the serene, passive stretch.
- To Exit: Don’t rush out of the pose. Bend your knees and slide them down the wall before rolling to one side. Rest there for a few breaths before pushing yourself back up to a seated position.
Benefits:
- Reduces Swelling and Fatigue in Legs: Ideal for those who spend a lot of time on their feet, this pose helps to drain fluid build-up and relieve tired legs and feet.
- Calms the Nervous System: The gentle inversion provides a calming effect, helping to reduce stress and anxiety.
- Improves Circulation: Encourages venous blood flow from the legs back to the heart, which can help with circulation issues.
Pro Tips:
- Add Support: If you feel any strain in your lower back, you can place a folded blanket or pillow under your hips for additional support.
- Modify for Comfort: If extending your legs fully up the wall is uncomfortable, consider a slight bend in the knees or a bolster under the knees.
- Combine with Gentle Breathing: Enhance the restorative effects by practicing deep breathing or a guided meditation while in the pose.
Legs Up the Wall is a gentle way to conclude an active yoga session or to simply take a break during your day. This pose invites gravity to help you relax and rejuvenate, providing a multitude of benefits with minimal effort. Ready to give your legs and mind the rest they deserve? Let’s head to the wall!
8. Downward Facing Dog
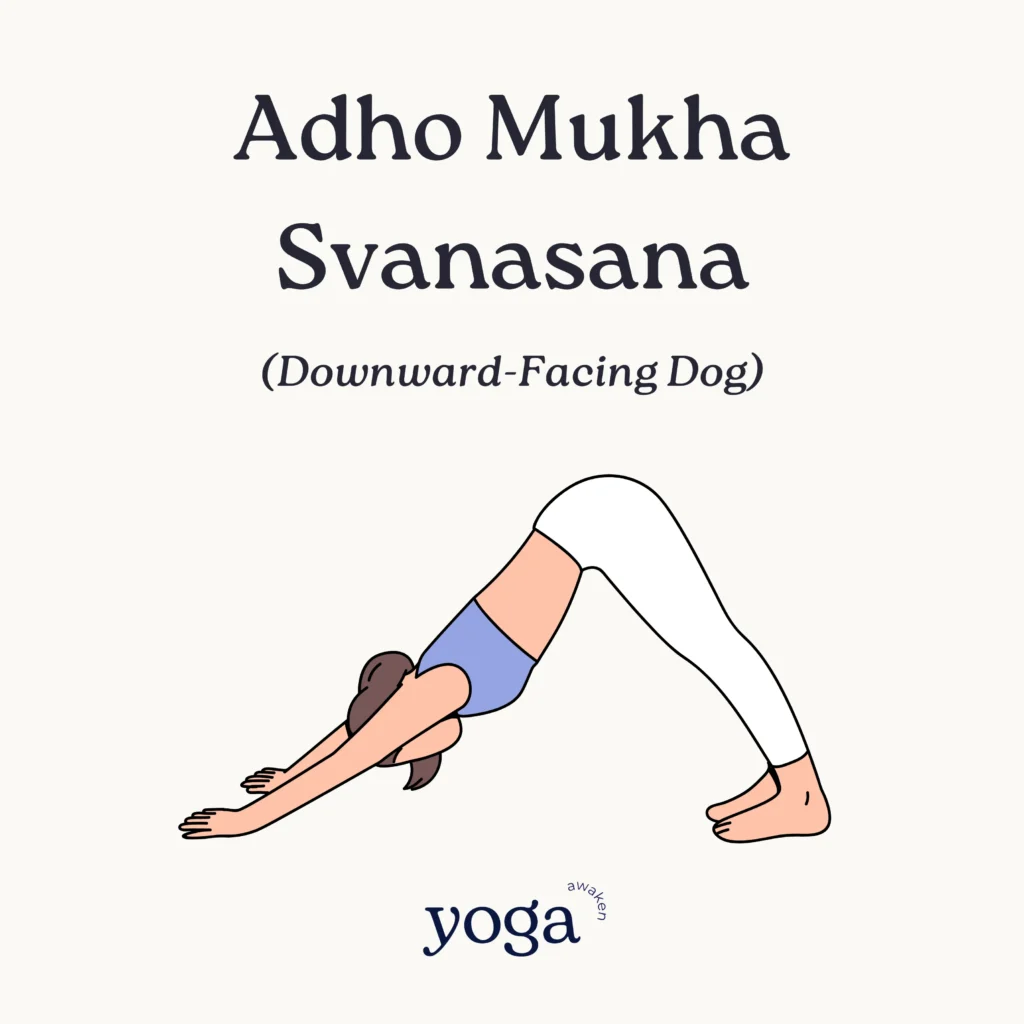
Energize Your Body with Downward Facing Dog
Get ready to invigorate your entire body with Downward Facing Dog, a staple pose in many yoga routines. This pose stretches and strengthens many parts of the body while calming the mind and improving circulation.
How to Do It:
- Start on All Fours: Begin on your hands and knees, with knees directly below your hips and your hands slightly forward of your shoulders. Spread your palms, index fingers parallel or slightly turned out, and press your toes into the mat.
- Lift and Lengthen: Exhale as you lift your knees away from the floor. At first, keep the knees slightly bent and the heels lifted away from the floor. Lengthen your spine and tailbone away from the back of your pelvis and press it lightly toward the pubis.
- Refine the Pose: Straighten your legs, but do not lock your knees, and begin to lower your heels toward the floor. Align your ears with your inner arms, and keep your head in line with your arms, not hanging.
- Hold and Breathe: Hold the position for 1 to 3 minutes, focusing on distributing the weight evenly across your hands and feet, and creating length in your spine.
- To Exit: To exit, exhale as you gently bend your knees and return to kneeling on all fours.
Benefits:
- Strengthens the Body: This pose engages the arms, shoulders, legs, and core, building strength throughout.
- Stretches the Back and Legs: It stretches the spine, hamstrings, calves, and arches of the feet.
- Energizes and Rejuvenates: Helps relieve stress and mild depression by rejuvenating the body, improving digestion, and calming the mind.
Pro Tips:
- Modify for Comfort: If you have difficulty straightening your legs or reaching your heels to the mat, place a rolled towel or yoga block under your hands or heels.
- Keep Your Shoulders Broad: Ensure your shoulders are broad; rotate the arms externally to keep the shoulder blades wide and avoid straining the neck.
- Engage Your Core: Activate your core muscles to support the back and maintain stability in the pose.
Downward Facing Dog is more than just a transitional pose; it’s a full-body refresh. Whether you’re using it as a part of a sequence or as a standalone exercise, it offers profound benefits for flexibility, strength, and mental focus. Ready to feel energized? Let’s go “downward dog”!
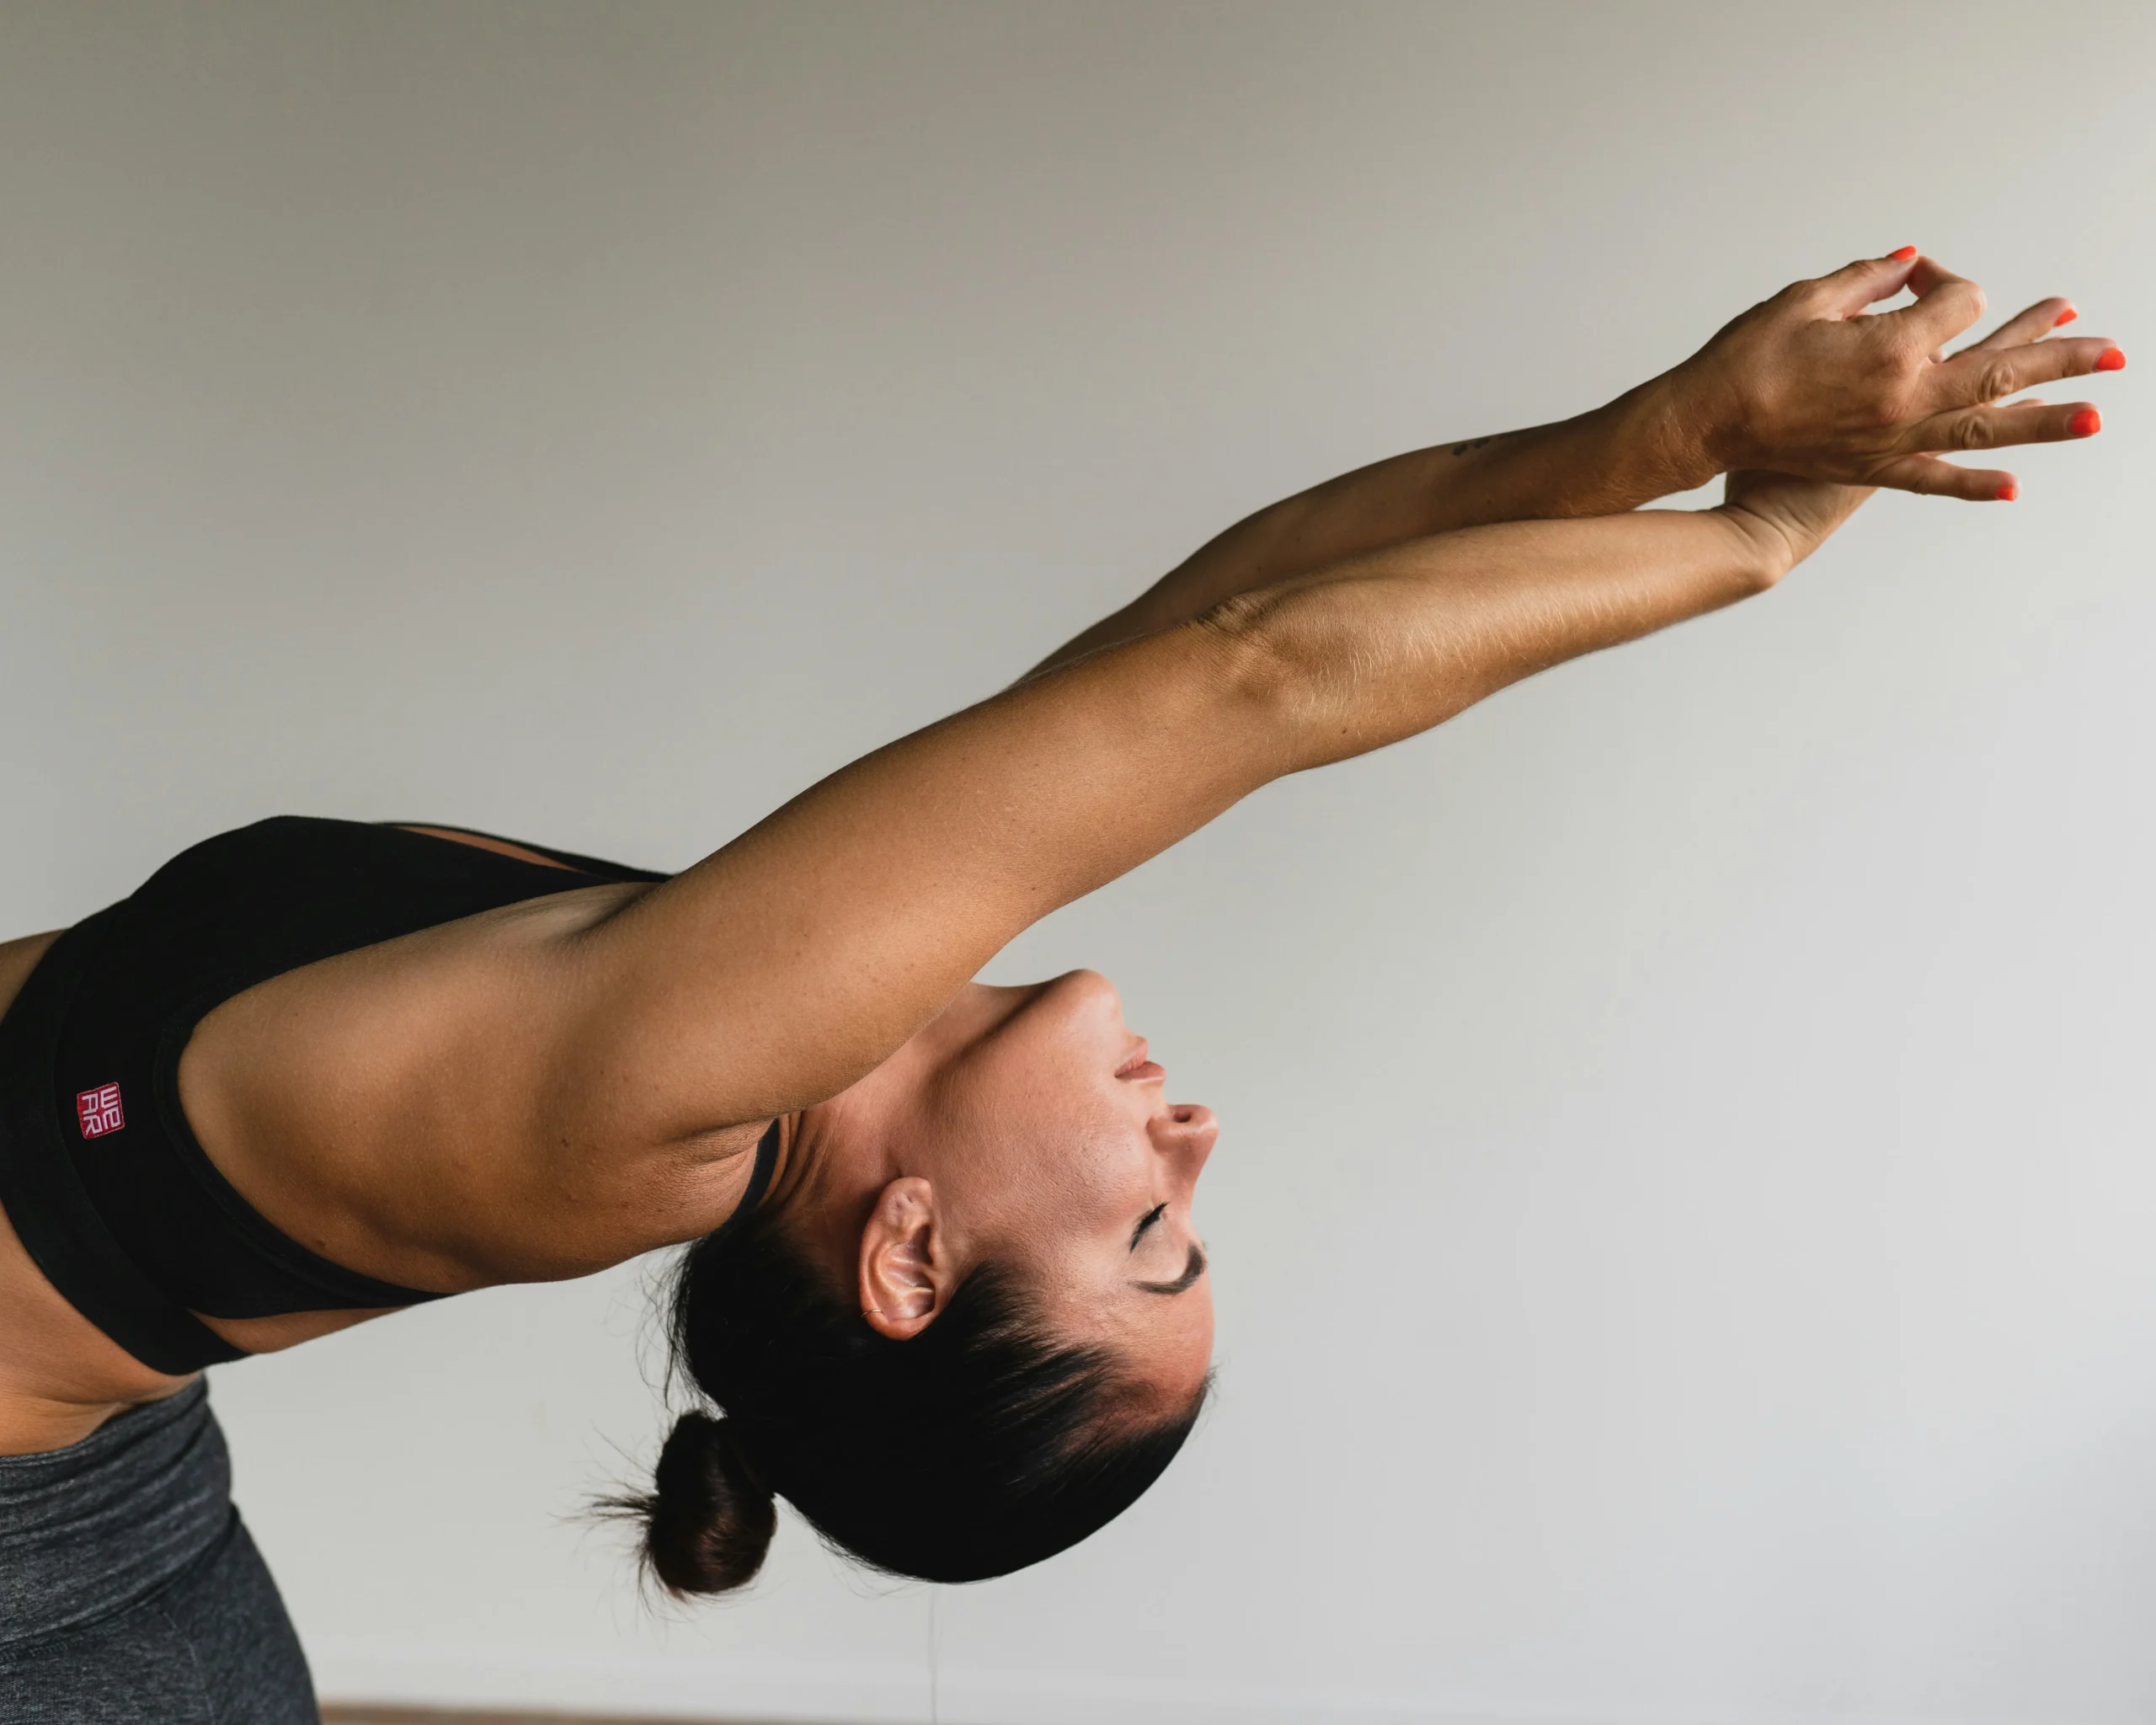
9. Cobra Pose
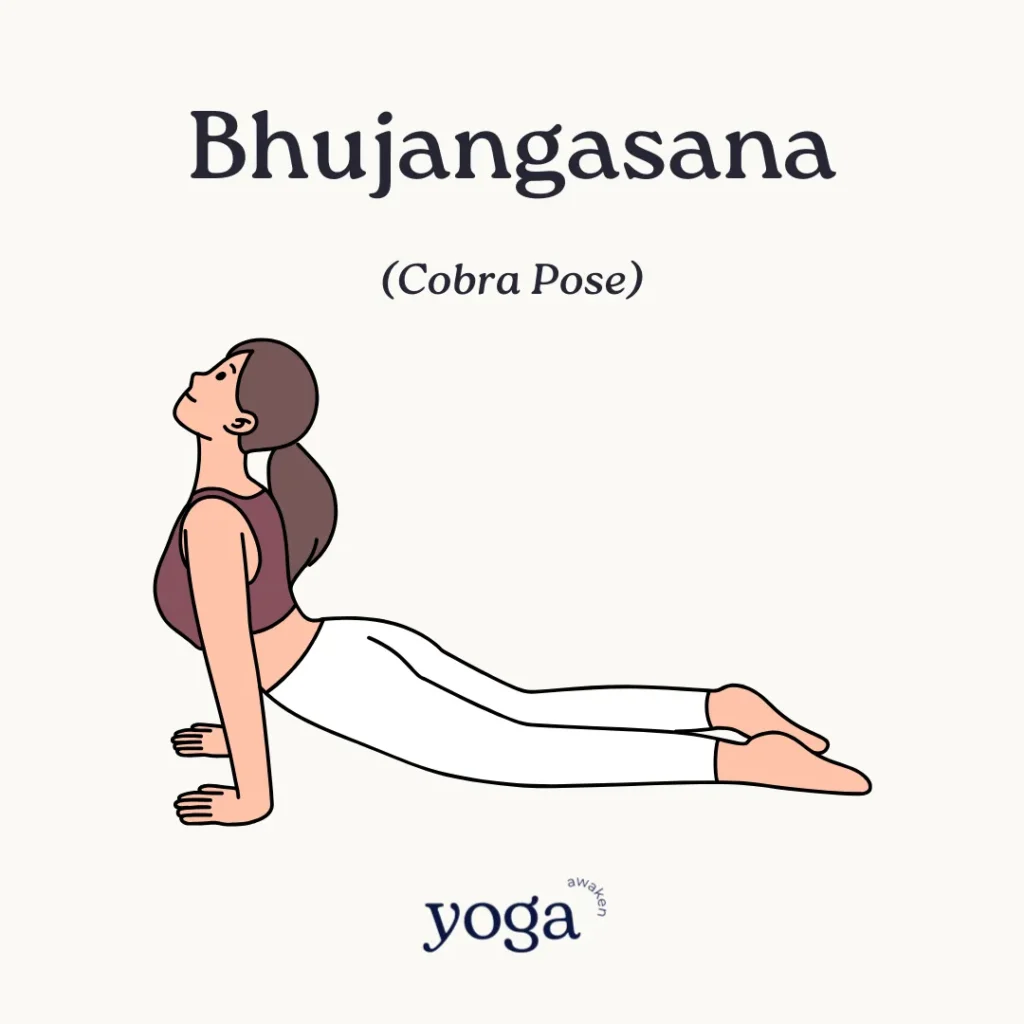
Gentle Back Bend with Cobra Pose
Cobra Pose, known for its graceful, energizing backbend, is an excellent way to increase spinal flexibility and strengthen the muscles of the back and shoulders. Let’s dive into how to execute this rejuvenating pose properly.
How to Do It:
- Start on Your Belly: Lie face down on your yoga mat with your legs extended behind you, tops of the feet pressing into the mat.
- Position Your Hands: Place your hands flat on the ground under your shoulders, keeping your elbows close to your body.
- Lift into Cobra: Press your hands into the mat and begin to lift your chest off the ground, straightening your arms as much as your body feels comfortable. Keep a slight bend in the elbows to maintain a natural curve in your lower back.
- Engage Your Lower Body: Firmly press the tops of your feet, thighs, and hips into the mat. This will help stabilize the pose and protect your lower back.
- Hold and Breathe: Keep your gaze directed straight ahead or slightly upward, ensuring your neck is aligned with the spine. Hold the pose for 15 to 30 seconds, breathing smoothly.
- To Exit: Slowly lower your chest back to the ground and relax your body.
Benefits:
- Strengthens the Spine: Cobra Pose strengthens the muscles of the spine, shoulders, and buttocks.
- Improves Flexibility: Regularly practicing this pose can increase flexibility in the back, which can help alleviate tension and pain.
- Stimulates Abdominal Organs: The pose stimulates abdominal organs, thereby improving digestion.
- Opens the Chest and Shoulders: Great for counteracting the slump of desk jobs, it opens up the chest and shoulders, improving oxygen intake.
Pro Tips:
- Don’t Overextend: It’s important not to force your back into bending too much; listen to your body and only rise as far as it feels comfortable.
- Keep Your Hips Grounded: Ensure your hips remain on the mat to keep the stretch in your back rather than lifting into a deeper backbend.
- Use Your Back Muscles: Focus on using your back muscles to lift you rather than pushing too much with your hands, which can lead to overstraining.
Cobra Pose is ideal for beginners and can be a fantastic way to introduce backbends into your routine. It offers a gentle yet effective way to enhance spinal health and overall flexibility. Ready to rise like a cobra? Let’s stretch into this beautifully strengthening pose.
10. Savasana
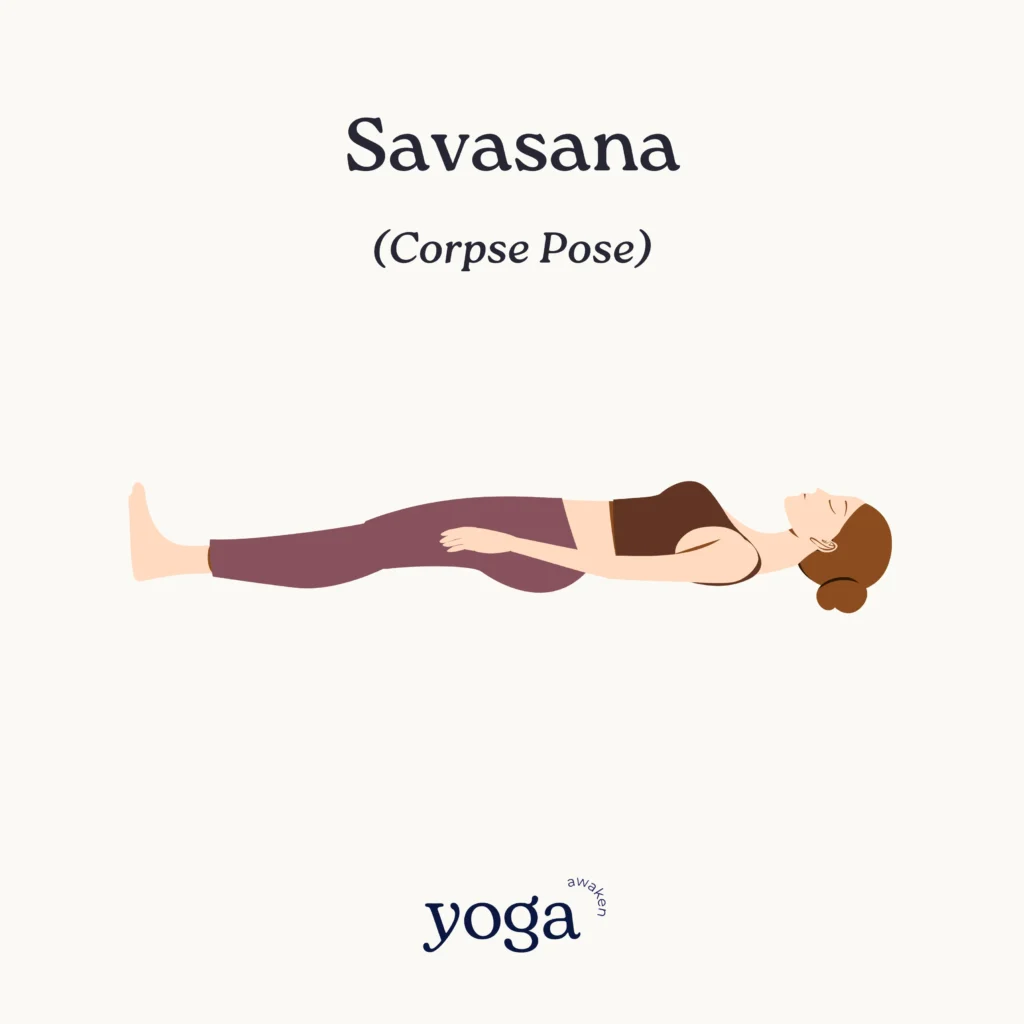
The Art of Relaxation: Savasana
Finally, we arrive at Savasana, also known as the Corpse Pose, which is often considered the most important part of any yoga practice. It’s a time for the body to absorb the benefits of the session and for the mind to enter a state of deep relaxation.
How to Do It:
- Prepare to Relax: Lay flat on your back on a comfortable yoga mat. Let your legs fall naturally apart and your arms rest by your sides, palms facing upwards. Adjust your position so that you are completely comfortable and still.
- Close Your Eyes and Breathe: Gently close your eyes and begin to breathe deeply and slowly. With each exhale, allow yourself to feel heavier and more relaxed.
- Focus on Relaxation: Scan your body from head to toe, consciously releasing tension from each part of your body. Allow your body to feel heavy and your mind to feel light.
- Stay in the Moment: Remain in this pose for 5 to 10 minutes, allowing your body and mind to rest fully. Resist the urge to move or react to any external sounds or distractions.
- Gently Reawaken: To exit the pose, start by deepening your breath. Slowly wiggle your fingers and toes to bring gentle movement back to your body. Roll over to one side, keeping your eyes closed, and rest there for a moment. When you’re ready, use your hands to push yourself up to a sitting position.
Benefits:
- Reduces Stress and Anxiety: Helps to lower stress levels, calms the mind, and may help reduce symptoms of anxiety.
- Enhances Body Awareness: Promotes a deeper awareness of the body, which can contribute to a greater sense of physical relaxation.
- Improves Concentration: The quiet and stillness of Savasana can help improve concentration and mental clarity.
- Rejuvenates: Provides a deep rest that can leave you feeling nourished and rejuvenated.
Read more about 5 Incredible Yoga Body Success Stories That Will Inspire You to Start Today!
Pro Tips:
- Ensure Comfort: Use any props you need, such as a pillow under your head, a bolster under your knees, or a blanket over your body to stay warm and comfortable.
- Set the Environment: Consider dimming the lights, playing soft, ambient music, or using an eye pillow to block out light and deepen your relaxation.
- Don’t Rush: Give yourself permission to take this time for deep relaxation. Avoid cutting it short even if you’re tempted to get up and move on with your day.
Savasana closes your yoga practice by allowing you to reap the full benefits of the physical work and mental focus you’ve put in. It’s a profound experience that enriches your entire well-being. Ready to embrace the sublime peace of Savasana? Let’s drift into tranquility.
Conclusion of Yoga for Old People
Congratulations on completing this refreshing journey through “10 Yoga for Old People Routines to Keep You Young”! Each pose we’ve explored today offers its unique blend of benefits, from enhancing physical strength and flexibility to boosting mental well-being and slowing down the aging process. Whether you’re new to yoga or looking to deepen your practice, these routines are tailored to help you maintain vitality, mobility, and energy as you age gracefully.
Ready to Boost Your Health?
Ready to transform your daily routine and embrace a healthier, more youthful lifestyle? Start incorporating these yoga poses into your daily routine today! Remember, consistency is key, and the benefits of yoga accumulate over time. Practice regularly, and you’ll likely notice improvements not just in your physical health, but also in your overall happiness and quality of life.
Share Your Experience and Connect: We love hearing from our readers! Drop a comment below to share which pose was your favorite, any modifications you’ve tried, or how yoga has impacted your life. If you have any questions or need further guidance on your yoga journey, don’t hesitate to ask.
Join Our Community: For more tips, tricks, and routines, subscribe to our newsletter and join our vibrant community on Instagram. Stay updated with the latest yoga trends and connect with fellow yoga enthusiasts who are embarking on similar paths to wellness.
Explore Further: If you’re looking for more personalized guidance, consider joining a yoga class specifically designed for seniors or consulting with a yoga therapist who can tailor a practice to your specific needs and goals.
Take the Next Step: Ready to deepen your practice? Check out our upcoming workshops and retreats, or explore our online classes from the comfort of your home. There’s no better time than now to commit to your health and well-being.
Embrace the power of yoga to slow down aging, energize your body, and calm your mind. Let’s step onto the mat together, embracing each day with strength, flexibility, and joy. Start today, because a journey of a thousand miles begins with a single step. Namaste!